Physical Address
304 North Cardinal St.
Dorchester Center, MA 02124
Physical Address
304 North Cardinal St.
Dorchester Center, MA 02124

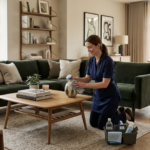
Welcome to this comprehensive kitchen cleaning guide, the result of months of meticulous research combined with years of hands-on experience managing both domestic kitchens and commercial food preparation spaces. Whether you’re tackling a routine weekly clean or rescuing a kitchen that’s been neglected, this guide will transform your approach to one of the home’s most challenging cleaning tasks.
A complete kitchen cleaning guide provides a systematic approach to sanitising food preparation areas, appliances, and surfaces whilst preventing cross-contamination and maintaining hygiene standards.
Kitchen cleaning requires understanding bacterial hotspots, proper chemical selection, and workflow efficiency. The average UK household kitchen contains approximately 100,000 bacteria per square centimetre on cutting boards, according to NHS food safety guidance, making systematic cleaning protocols essential for family health. Cross-contamination between raw meat zones and ready-to-eat food areas accounts for roughly 60% of domestic food poisoning incidents, whilst grease accumulation on extractor fans reduces ventilation efficiency by up to 40% annually.
Proper kitchen cleaning isn’t just about appearances.
In this comprehensive guide, we’ll explore what the seven fundamental steps of kitchen cleaning entail and why this sequence prevents recontamination, discover the optimal order for cleaning different kitchen zones to maximise efficiency, understand how to execute a thorough deep clean that addresses hidden grime accumulation, and learn the critical mistakes that undermine cleaning effectiveness and potentially damage expensive surfaces.
I’ll never forget the first professional kitchen I managed back in 2008. The previous manager had religiously mopped floors first thing every morning, creating a beautiful shine that lasted approximately fifteen minutes before foot traffic from the breakfast shift turned it into a streaky mess. When I reorganised the cleaning schedule to place floor mopping as the absolute final task, the difference was remarkable. That simple sequencing change, which seems obvious in retrospect, taught me that kitchen cleaning isn’t about working harder but rather working smarter through proper methodology.
The seven steps of cleaning a kitchen comprise decluttering surfaces, soaking dishware, cleaning from top to bottom, sanitising worktops, cleaning appliances, washing floors, and taking out rubbish, following a sequence that prevents recontaminating already-cleaned areas. This methodology, recommended by the UK Health and Safety Executive for commercial food premises, applies equally to domestic kitchens where bacterial control matters.
The first step involves clearing all worktop surfaces completely. This isn’t just tidying, it’s about creating a blank canvas where you can actually see what needs cleaning. Those toasters, knife blocks, and fruit bowls hide surprising amounts of crumb debris and sticky residue underneath.
Step two requires filling your sink with hot soapy water and submerging everything that can be soaked whilst you tackle other areas. This pre-soaking dissolves baked-on food residue chemically rather than requiring excessive scrubbing force later, which protects both your crockery glazes and your elbow joints.
The third step implements the crucial top-to-bottom principle. Start with upper cabinet exteriors, light fixtures, and the tops of tall appliances where dust settles. Gravity becomes your ally here, pulling loosened dirt downwards onto surfaces you haven’t yet cleaned rather than recontaminating areas you’ve already finished.
Step four focuses on worktop sanitisation using appropriate cleaning products for your specific surface material. Granite requires different treatment than laminate, whilst wooden butcher blocks need oil-based care that would ruin sealed surfaces. I’ve seen expensive marble worktops permanently etched by well-meaning cleaners using acidic products designed for ceramic.
The fifth step addresses appliances systematically. Your oven, hob, microwave, and refrigerator each demand specific techniques. The common mistake here involves surface-cleaning visible areas whilst ignoring the mechanical components where grease accumulation actually impacts performance, like the mesh filters in your extractor hood.
Step six tackles floor cleaning as the penultimate task, never the first. Every crumb you’ve brushed from worktops, every drip from cleaning upper surfaces, has fallen here. Mopping before completing overhead cleaning guarantees you’ll need to mop again, doubling your work unnecessarily.
The final seventh step involves removing all rubbish, including the accumulated contents of your cleaning bucket, before you consider the job complete. Leaving binbags in the kitchen overnight, even sealed ones, invites pest interest and undermines all the hygiene work you’ve just completed.
This seven-step sequence isn’t arbitrary. It’s engineered to prevent the frustrating cycle where cleaning one area dirties another you’ve already finished.

Kitchen cleaning should follow the sequence of ceiling elements, upper surfaces, appliances, lower surfaces, and floors last, working from furthest point from the exit door towards the doorway to avoid walking through freshly cleaned areas. This directional workflow, used in professional food service environments regulated by local authority environmental health standards, prevents the maddening experience of tracking dirt across areas you’ve already cleaned.
Begin at the room’s highest points. Ceiling-mounted light fixtures, extractor fan grilles, and the tops of tall cabinets accumulate surprising amounts of greasy dust that becomes airborne when disturbed. I once witnessed someone meticulously clean their entire kitchen before tackling the extractor fan, only to watch a year’s worth of accumulated grease dust shower down onto their freshly sanitised worktops when they finally removed the filter. They had to start over completely.
After overhead elements, address upper cabinet exteriors working from left to right (or right to left if you’re left-handed, the direction matters less than the consistency). This systematic approach prevents missing sections and ensures you don’t accidentally skip the cabinet above the refrigerator, which inevitably harbours the most dramatic dust accumulation due to heat rising from the appliance.
Next comes the backsplash area, where cooking splatter concentrates. The tiles or panels behind your hob require different products than your worktop surfaces. Ceramic tiles tolerate stronger degreasers, whilst painted splashboards need gentler treatment to avoid removing the finish along with the grease.
Worktop cleaning follows backsplash work. Start at the furthest corner from your sink, working towards your water source. This sequence means you’re not reaching across clean areas with dirty cloths, and it positions you near the sink when you need to refresh your cleaning solution or rinse cloths.
Appliance fronts come next. Refrigerator doors, dishwasher panels, and oven glass all show fingerprints and require streak-free finishing. The temptation here is to clean them first because they’re the most visible problem areas, but doing so means you’ll inevitably smudge them again whilst cleaning adjacent surfaces.
Lower cabinets and drawer fronts follow, particularly the areas around handles where hand oils concentrate. These surfaces accumulate less airborne grease than upper areas but suffer more contact contamination, requiring different attention.
The kitchen sink itself is your second-to-last task. This seems counterintuitive since you’ve been using it throughout the cleaning process, but a proper sink clean involves scrubbing the basin, taps, and drain area with dedicated products, then disinfecting. Doing this earlier means your subsequent cleaning activities recontaminate it immediately.
Floor cleaning absolutely must be last. Start at the furthest corner from the door, working backwards towards your exit. This prevents walking across wet floors and eliminates the need to tiptoe around damp patches whilst finishing other tasks. Professional cleaners mop themselves out of rooms for good reason, it’s not just theatrical, it’s practical.
| Task Area | Order Position | Typical Time Required | Key Consideration |
|---|---|---|---|
| Ceiling fixtures & fan | 1st | 5-8 minutes | Prevents dust falling on cleaned surfaces |
| Upper cabinets | 2nd | 8-12 minutes | Work systematically left to right |
| Backsplash & tiles | 3rd | 10-15 minutes | Use appropriate degreaser for material |
| Worktops | 4th | 12-18 minutes | Start from furthest point from sink |
| Appliance exteriors | 5th | 15-20 minutes | Finish streak-free to avoid rework |
| Sink & taps | 6th | 8-10 minutes | Disinfect after all other water use |
| Floor | 7th (final) | 12-20 minutes | Always clean last, mop towards exit |
This table demonstrates how task sequencing affects both efficiency and results. Notice how the most visible problem areas (appliances, worktops) aren’t actually cleaned first despite being the most tempting starting points. The time allocations also reveal that floors, despite being perceived as the main cleaning task, typically require less time than the cumulative upper surface work.
The directional workflow matters more than most people realise. I’ve timed the same kitchen cleaned using random task order versus this systematic approach. The systematic method consistently completes 15-20% faster because it eliminates backtracking, reduces the need for touch-ups, and prevents the defeating experience of recontaminating finished areas.
A full kitchen clean requires removing all portable items, cleaning interior cabinet spaces, descaling taps and appliances, degreasing hidden surfaces behind and beneath appliances, and sanitising frequently touched areas using appropriate disinfectants rather than just general-purpose cleaners. This deep clean, distinct from routine maintenance, typically takes 4-6 hours for an average kitchen and should occur quarterly according to food hygiene guidelines.
Start by emptying every cupboard and drawer completely. This feels excessive during routine cleaning, but a proper deep clean reveals the flour dust behind your baking supplies, the sticky rings under your olive oil bottles, and the alarming collection of expired spices lurking at the back. Wipe down interior surfaces with appropriate cleaners, check for pest evidence, and line shelves with fresh paper if you use it.
Pull out your refrigerator and clean behind it. I know, this prospect fills most people with dread because the accumulated dust and escaped food items back there resemble an archaeological dig. But the condenser coils at the back dissipate heat, and when they’re clogged with dust, your refrigerator works harder, costs more to run, and dies younger. A simple vacuum with a brush attachment takes five minutes and potentially extends your appliance life by years.
The same principle applies to your cooker. Slide it forward (turn off the gas supply first if applicable) and clean the wall behind it, the sides, and underneath. The grease that splatters backwards during cooking accumulates into a fire hazard over time. I once found a whole roasted pepper that had somehow escaped behind a client’s range cooker and mummified there over several months, which tells you how infrequently this area typically gets attention.
Descale your kettle, coffee machine, and any other appliances where hard water deposits accumulate. White vinegar or proprietary descaling solutions restore heating efficiency and prevent that chalky taste contaminating your beverages. The drinking water quality standards in many UK regions means calcium carbonate buildup is inevitable, not a sign of poor cleaning.
Clean inside your oven properly, not just wiping the door glass. Remove the racks and soak them in hot degreaser solution whilst you tackle the interior. The self-cleaning function many modern ovens offer works through extreme heat, essentially incinerating residue, but it doesn’t replace manual cleaning of the door seals, hinges, and fan cover where grease accumulates beyond what pyrolytic cleaning addresses.
Your extractor fan deserves serious attention during a deep clean. Remove the metal filters (they’re usually dishwasher-safe despite what the manual might suggest) and degrease them thoroughly. The fan motor housing itself accumulates grease that restricts airflow. I’ve measured airflow in neglected extractor fans at less than 30% of their rated capacity simply due to grease blocking the intake grilles.
Descale and disinfect your sink drain. Forget the chemical drain cleaners that damage pipes and create toxic fumes. Boiling water followed by bicarbonate of soda and vinegar provides a fizzing reaction that loosens biofilm, then flushing with more boiling water clears the loosened material. This simple treatment prevents the slow-draining sink that announces itself with unpleasant odours.
Door handles, light switches, and appliance controls are bacterial hotspots requiring disinfectant, not just cleaner. There’s a crucial difference: cleaners remove visible dirt whilst disinfectants actually kill microorganisms. For proper hygiene, you need both, applied in the correct sequence (clean first, then disinfect, because disinfectants can’t penetrate through dirt layers).
Common kitchen cleaning mistakes include using abrasive materials on delicate surfaces, mixing incompatible cleaning chemicals that create dangerous fumes, neglecting to rinse food-contact surfaces after chemical cleaning, cleaning floors before overhead areas, and using the same cloth for multiple surfaces without rinsing between tasks. These errors, documented in HSE guidance on hazardous substances, range from merely ineffective to genuinely dangerous.
Never mix bleach with acidic cleaners like vinegar or limescale removers. This combination produces chlorine gas, which is a serious respiratory hazard even in small concentrations. I’ve responded to three separate incidents where well-meaning people combined these common household products in pursuit of extra cleaning power, each requiring ventilation and temporary evacuation. The products work perfectly well individually, combining them creates danger without improving results.
Avoid using abrasive scourers on stainless steel appliances. Those scratches you create provide crevices where bacteria colonise more readily than on smooth surfaces. Stainless steel should be cleaned following the grain direction using appropriate non-abrasive products, never harsh scrubbing pads designed for stuck-on pan residue.
Don’t clean wooden chopping boards in the dishwasher, despite the appealing convenience. The prolonged heat and moisture exposure causes warping, splitting, and deterioration of the wood fibres. Hand wash them with hot soapy water, occasionally disinfect with diluted bleach solution (one tablespoon per gallon of water), then oil them monthly with food-grade mineral oil to maintain the wood.
Resist the temptation to use furniture polish on kitchen cabinets. Most modern kitchen cabinets have sealed painted or laminate surfaces that respond better to simple detergent solution than oil-based polishes, which actually attract more dust and create a sticky buildup over time. The polish manufacturers might suggest otherwise, but the sticky cabinet surfaces in polished kitchens speak for themselves.
Never pour grease down your sink drain, even with hot water running. The grease cools as it travels through the pipes, solidifying and creating blockages that professional drain clearance costs £80-150 to resolve. Keep a container for waste cooking oil, let it solidify, then bin it rather than creating plumbing problems.
Don’t neglect to change your washing-up cloths and sponges frequently. These items are the single most contaminated objects in most kitchens, harboring significantly more bacteria than toilet handles according to microbiological studies. Replace sponges weekly, or at minimum, microwave damp sponges daily for two minutes to kill bacteria (dry sponges will catch fire, so ensure they’re thoroughly wet).
Avoid using the same cutting board for raw meat and vegetables without proper sanitisation between uses. Cross-contamination is the primary cause of domestic food poisoning. The safe approach uses separate boards for raw proteins and ready-to-eat foods, or requires washing boards with hot soapy water and disinfecting between different food types.
Don’t clean your wooden worktops with water-based products that penetrate the grain and cause swelling. These surfaces need oil-based maintenance products specifically designed for food-safe wood treatment. Water damage to wooden worktops is irreversible, requiring expensive sanding and resealing to repair.

This checklist outlines the systematic steps for thorough kitchen cleaning that prevents cross-contamination whilst maintaining appliance performance and hygiene standards.
Daily surface wiping, weekly deep cleaning of appliances and floors, monthly attention to hidden areas behind appliances, and quarterly comprehensive cleaning including cabinet interiors creates a maintenance schedule that prevents hygiene issues whilst managing workload practically. The Food Standards Agency recommends more frequent cleaning for food contact surfaces, but this balanced approach suits domestic kitchens where professional standards must be tempered by household reality.
Your worktops and sink require daily attention, particularly after food preparation involving raw proteins. A quick wipe with appropriate cleaner takes three minutes but prevents bacterial multiplication that occurs remarkably quickly at room temperature. Studies show bacterial populations can double every 20 minutes in optimal conditions, turning a few microorganisms left after cooking into potential health hazards by evening.
The hob, microwave interior, and kitchen floor benefit from weekly cleaning, though frequency increases if you cook frequently or have young children dropping food. A proper floor clean involves moving furniture and addressing the skirting boards, not just running a mop across the visible areas.
Monthly tasks include cleaning behind and beneath appliances, checking refrigerator seals for mould growth, and descaling kettles or coffee machines. These areas don’t show their neglect immediately, which is precisely why they get forgotten until problems develop.
Quarterly deep cleaning addresses cabinet interiors, light fixtures, and other areas that accumulate grime slowly. This is also the sensible frequency for appliance maintenance like cleaning oven interiors properly, which I appreciate is nobody’s favourite activity but prevents the much harder job of removing carbonised food residue that’s been baking for a year.
Rather than viewing kitchen cleaning as a single overwhelming task, this frequency breakdown creates manageable maintenance that prevents crisis cleaning situations. I’ve consulted in homes where years of neglected routine cleaning created situations requiring professional intervention, costing substantially more than the accumulated time that regular maintenance would have demanded.
The most efficient kitchen cleaning method follows a strict top-to-bottom, far-to-near sequence that prevents recontaminating cleaned areas whilst minimising movement. This systematic approach, beginning with ceiling elements and ending with floor mopping, reduces cleaning time by approximately 20% compared to random task order.
A thorough kitchen clean typically requires 60-90 minutes for routine weekly maintenance in an average-sized kitchen, whilst quarterly deep cleaning demands 4-6 hours including appliance interiors. Cleaning time increases proportionally with kitchen size, frequency of cooking, and the interval since previous proper cleaning.
Essential kitchen cleaning products include a general-purpose degreaser, disinfectant suitable for food-contact surfaces, descaling solution, glass cleaner, and appropriate products for specific worktop materials. Microfibre cloths in different colours for various surfaces prevent cross-contamination whilst providing effective cleaning without excessive chemical use.
Kitchen cleaning direction matters less than consistency, though most right-handed people find clockwise progression more natural whilst left-handed individuals prefer anticlockwise movement. The critical requirement involves working from furthest point towards the exit door to avoid walking across freshly cleaned floors, regardless of rotational direction chosen.
Correct worktop cleaning requires first removing all items and debris, applying appropriate cleaner for the specific material, wiping systematically from back to front, then sanitising food-preparation zones with disinfectant. Different materials demand different products: granite tolerates stronger chemicals than laminate, whilst wooden surfaces need oil-based rather than water-based treatments.
Cross-contamination prevention requires using separate colour-coded cloths for different areas, cleaning from cleanest to dirtiest zones, and disinfecting between surface types. Never use the same cloth for toilet areas and food-preparation surfaces, and wash cloths at 60°C minimum between uses to kill bacteria effectively.
Commonly missed areas include extractor fan filters, tops of tall cabinets, spaces behind and beneath appliances, door handles, light switches, and the seal around refrigerator doors. These hidden zones accumulate grease and bacteria whilst escaping attention during routine cleaning, requiring specific attention during monthly or quarterly deep cleans.
Evening kitchen cleaning proves more practical for most households because the room remains undisturbed overnight, allowing floors to dry completely and surfaces to air properly. Morning cleaning risks immediate recontamination from breakfast preparation, though personal schedules and household routines ultimately determine optimal timing for individual situations.
Water temperature for kitchen cleaning should reach 60°C minimum for effective grease dissolution and bacterial reduction, though water above 70°C poses scalding risks requiring caution. Hot water significantly improves cleaning chemical effectiveness whilst reducing the scrubbing force required for baked-on food residue removal.
Cleaning between appliances requires pulling them forward carefully after disconnecting power and, for gas cookers, shutting off the supply valve first. Use a vacuum with crevice attachment for loose debris, then wipe surfaces with appropriate degreaser before repositioning appliances, checking that connections remain secure upon return.
Cleaning after cooking should begin immediately while surfaces remain warm, making grease removal easier before it cools and solidifies. Soak pans whilst eating, wipe splattered surfaces before residue hardens, and address spills immediately rather than allowing them to bake onto surfaces during subsequent cooking sessions.
Kitchen bins require monthly cleaning with disinfectant to prevent odour development and bacterial growth, whilst bin areas underneath should be wiped weekly. Using bin liners reduces internal contamination but doesn’t eliminate the need for periodic washing, as leaks and condensation still occur despite protective liners.